**

Content on this page requires a newer version of Adobe Flash Player.

Get Adobe Flash player

ASSIGNMENT:
Create an 8-frame, looping walk cycle in 3/4 perspective.


LAYOUT:
Before we jump into the actual animation, let's establish the perspective and layout of our character.
We're just going to be practicing in this exercise so a simplified character will be used.


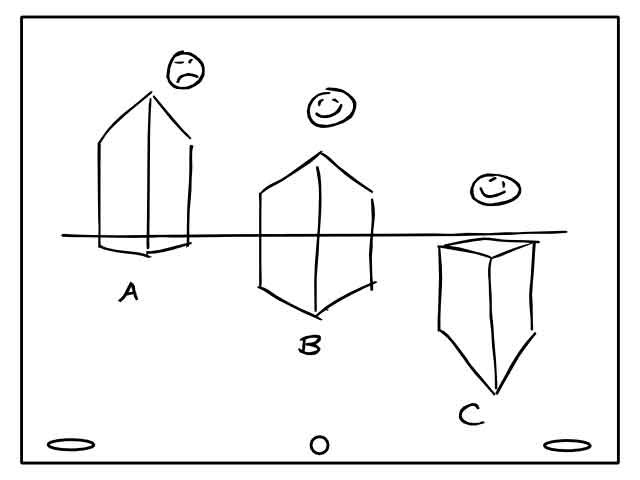
Out of the three cubes shown, "A" is the least desirable position to use in this exercise. Avoid drawing a character this close to the horizon line.
plo_01

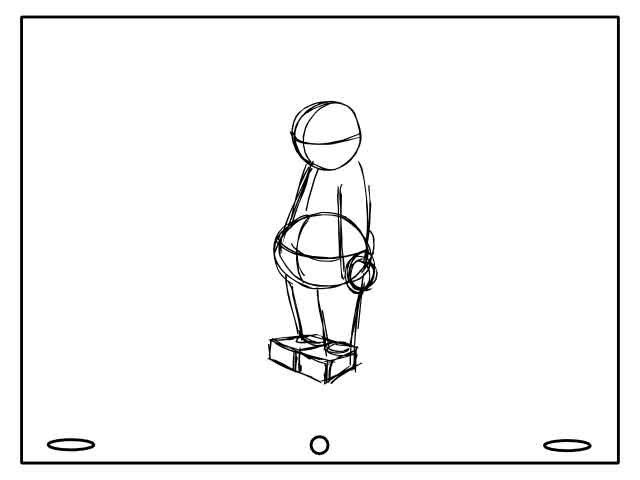
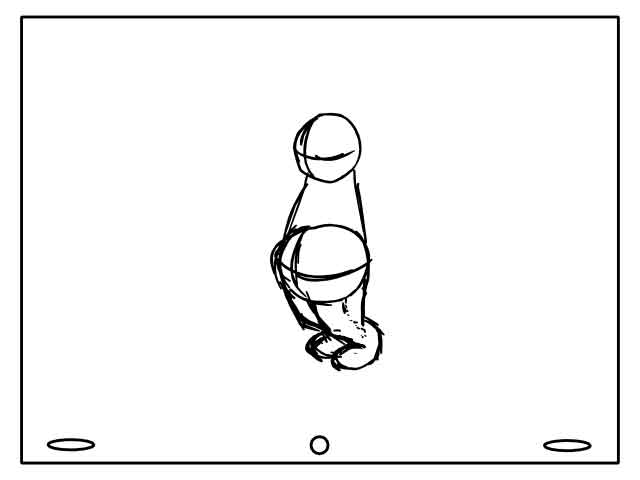
1). Here, a character consisting of basic geometry is drawn in 3/4 Perspective to establish design, size and layout. This pose won't actually be used in my animation.
plo_2

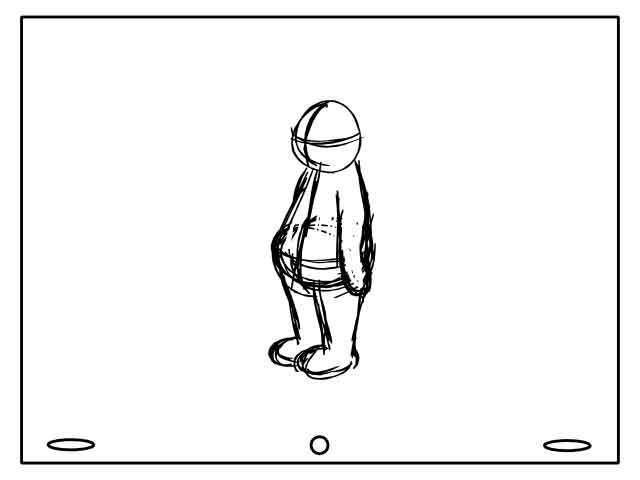
If needed, additional geometry can be drawn to help achieve the proper perspective.
plo_3perspective

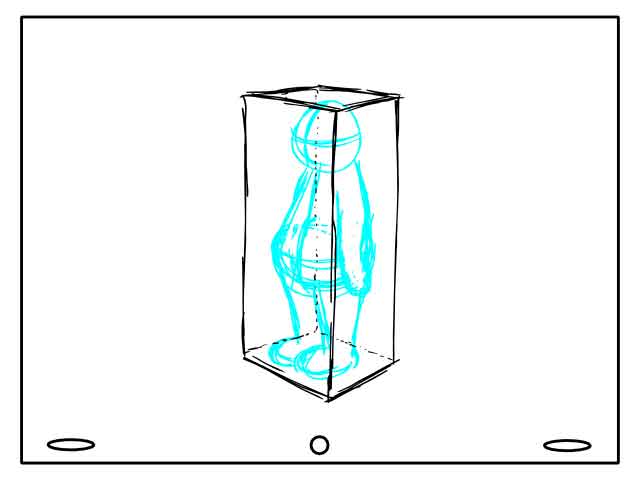
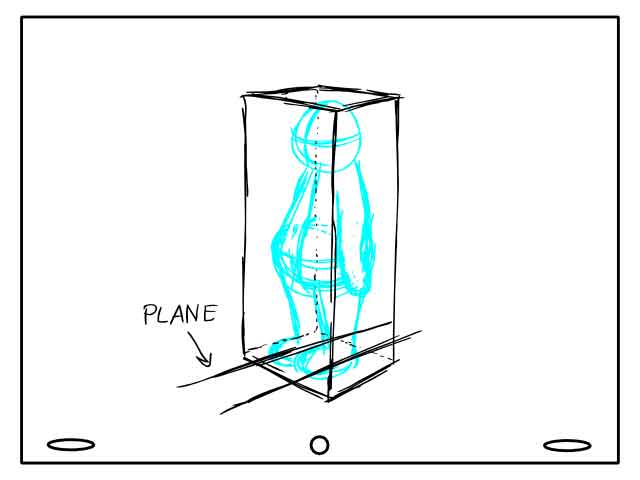
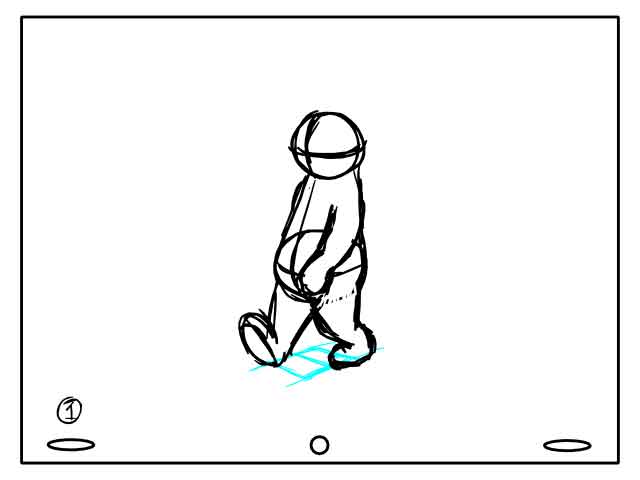
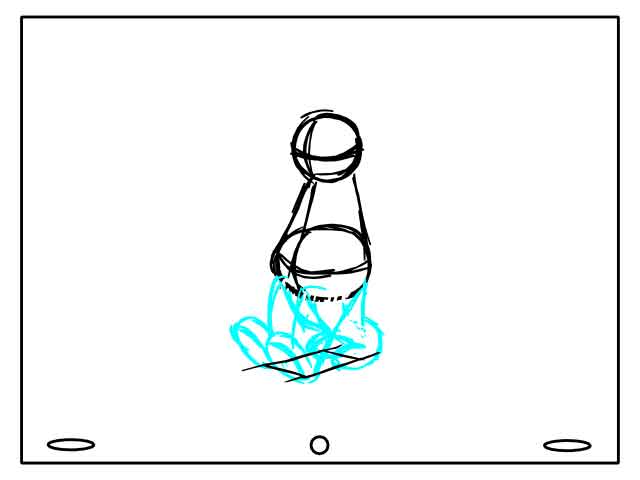
2). From here, we need to establish two important variables: Angle and Direction. By using the character's shoulders, hips and heels, we can find the Angle he is standing at. The character's face, naval and toes help us find the Direction he is facing.
plo_4

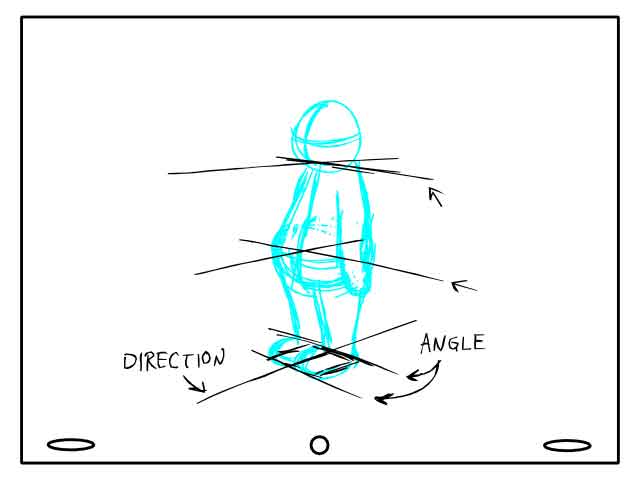
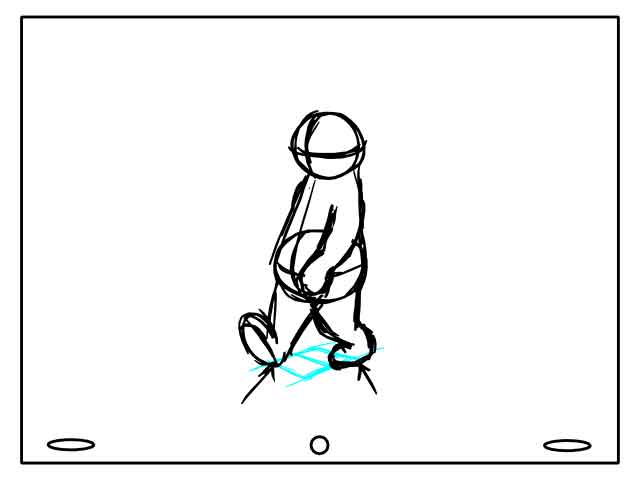
All of this info is used to create an Area Box. This Area Box will help guide the characters feet so they won't look like they are sliding or floating along the ground.
plo_5


KEY FRAMES:
Now we can start animating!


First, let's look at a basic Side Walk Cycle-

Content on this page requires a newer version of Adobe Flash Player.

Get Adobe Flash player


In an 8-frame walk cycle, the two most important drawings are-
Frame 1- Extreme Stride, and Frame 3- Mid Stride.

sideside

Frame 1 is the Extreme Stride because it is the point in the walk which both feet and hands will be as far away from each other as they are going to get. It also contains the contact points for the heels and toes of the character.
Notice in the animation above, how the planted foot stays on the plane, never going above or below while it is planted.

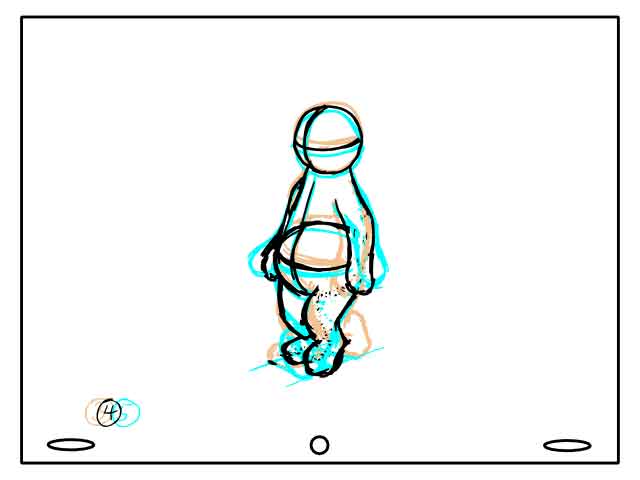
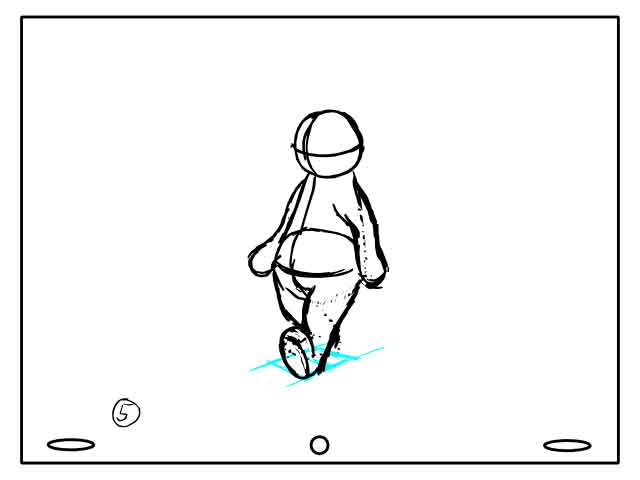
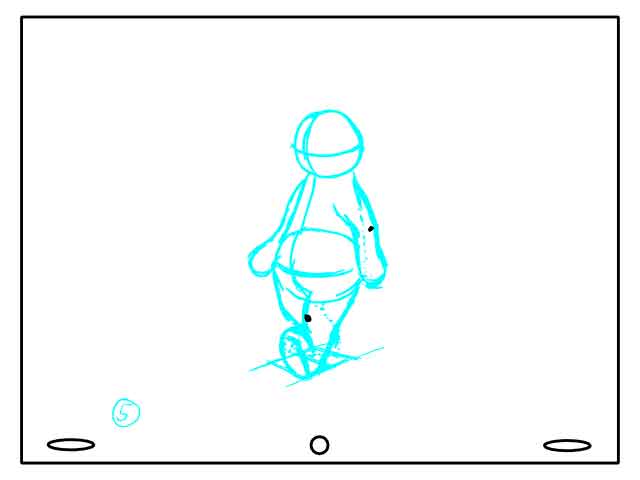
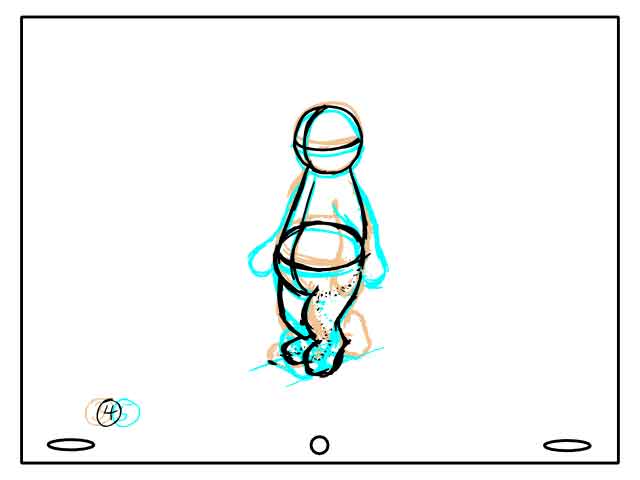
Frame 5 is the other Extreme Stride drawing where the feet are switched.
plo_9

Frame 3 is the Mid Stride because it is the point where the feet are exactly in the middle of transitioning from one step to the other.
Notice how the planted foot is centered over the mid-point arrow.

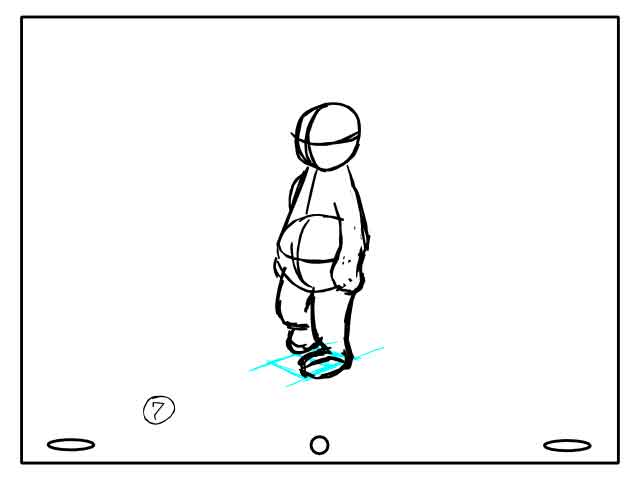
Frame 7 is the other Mid Stride drawing where the feet are switched.
plo_10

Let's apply these principles to our 3/4 Walk.

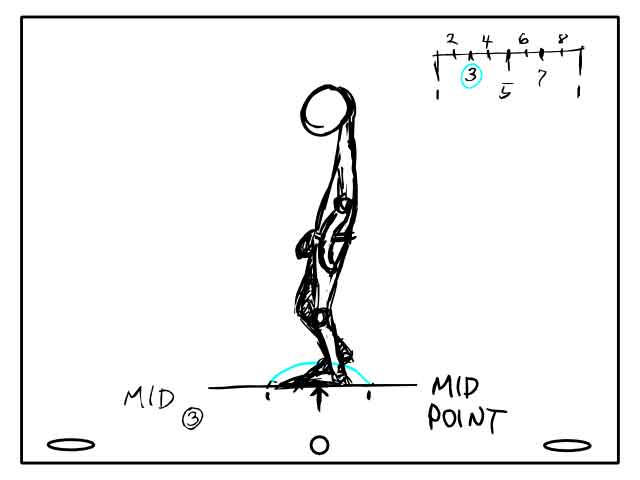
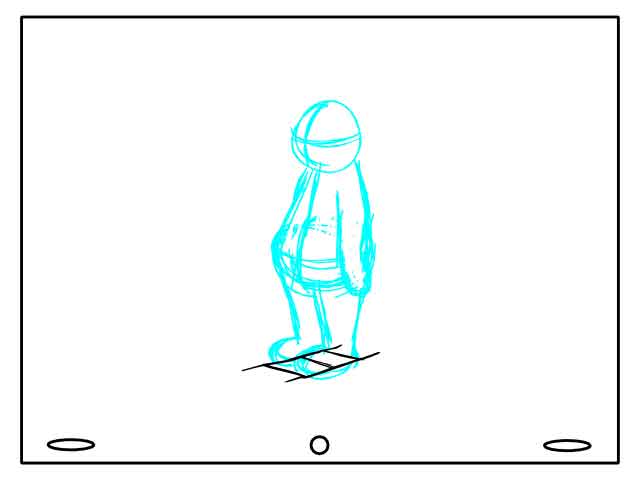
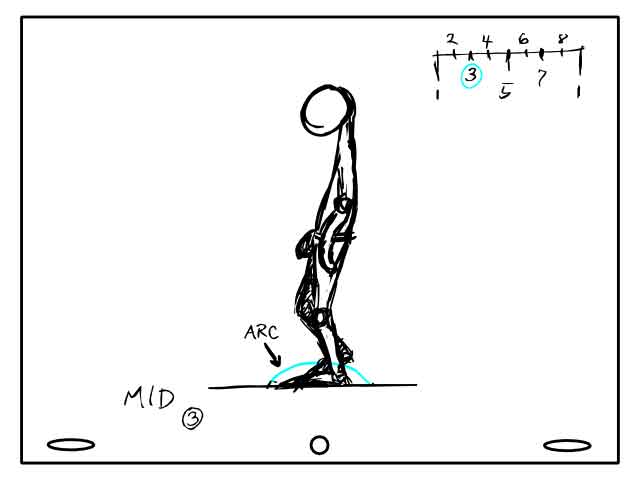
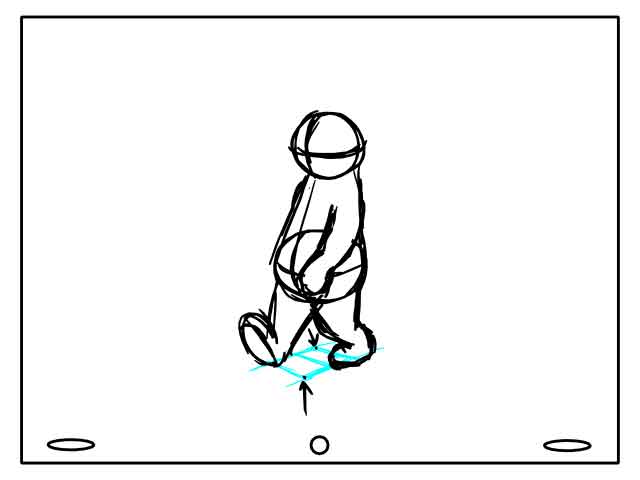
3). With the Area Box acting as my plane...
plo_11

...draw the character in his Extreme Stride- Frame 1.
plo_11

The corners of the Area Box act as contact points for the heels and toes. The center line of the Area Box marks where the planted foot will go for the Mid Stride.
plo_12walk

If you find drawing a character in this first walking pose difficult, here is a trick that may help-

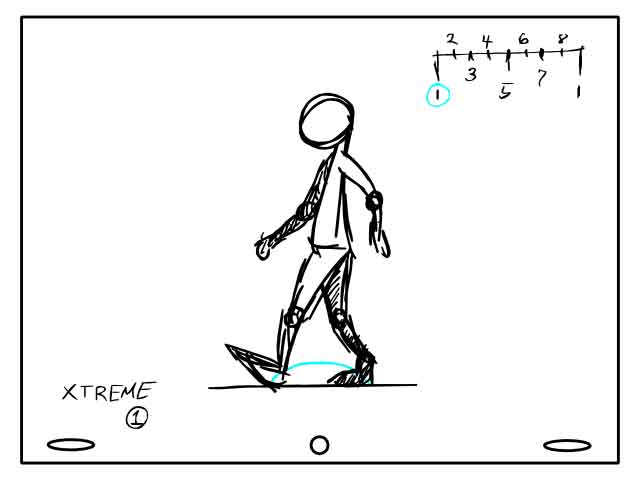
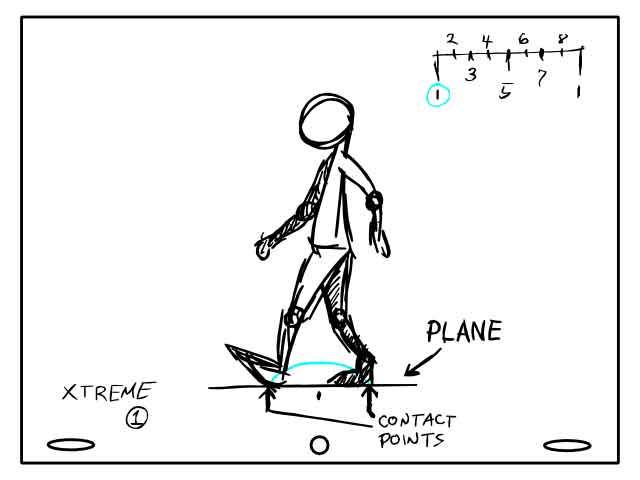
Using the standing pose as a reference, draw the character with both feet forward...like in a long jump. Remember that the body will be lower here.
plo_13walk

Next, draw both feet back and then overlay the two poses.
wlo17wlo18

Now, use this composite to draw one leg out and the other one back.
wlo19wlo20

With Frame 1 drawn, you can get Frame 5 by tracing the body and switching the positions for the arms and legs.
wlo47

4). Now you need the Mid Stride- Frame 3. In most cases, the body goes up on this key frame (if it goes down, the character will be strutting).
wlo21
Use the center line in the Area Box to position the planted foot. I find it easiest to draw a footprint first and then build the leg up from there.
Remember, the lines of the leg for Frame 3 simply go inbetween the lines of Frames 1 and 5.

wlo22wlo23
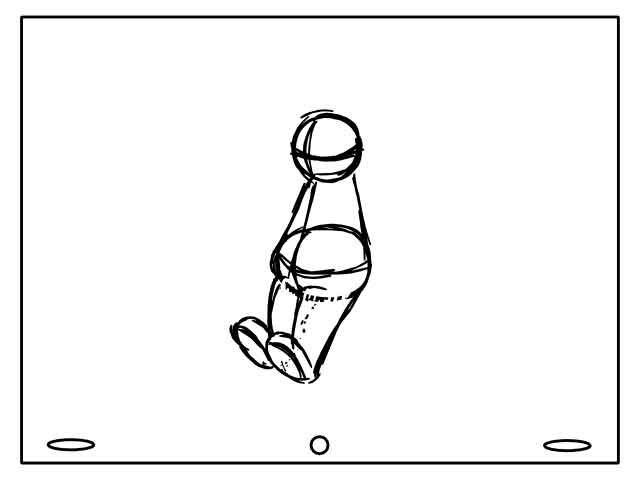
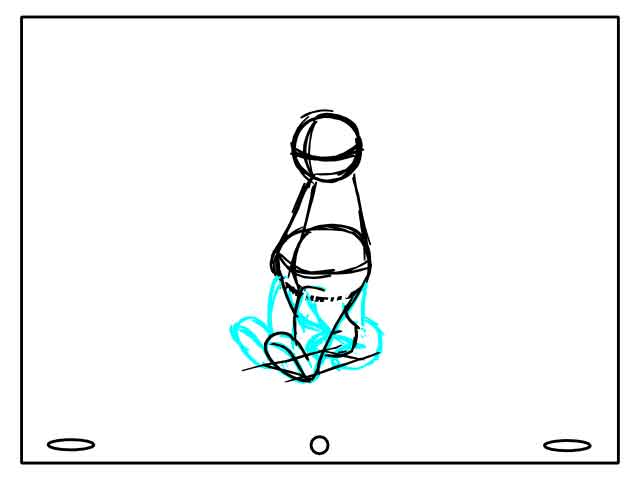
It is best to draw objects that go behind other objects first (in this case, the right leg) then draw foreground objects on top and erase. This helps to keep consistent shapes in your character.

Always use reference points to help find your inbetweens.
For example, points that represent the knees and elbows...
wlo24wlo25
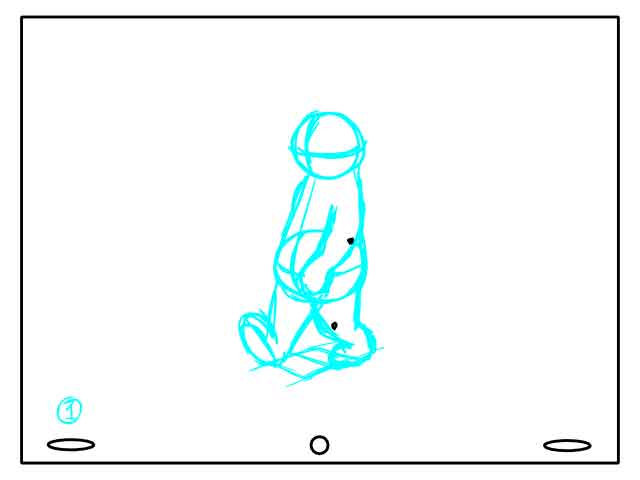
...help you to find the points for the tweens...
wlo26wlo27
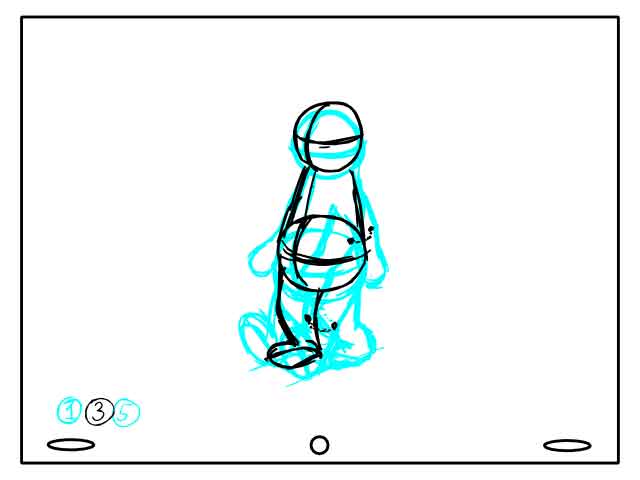
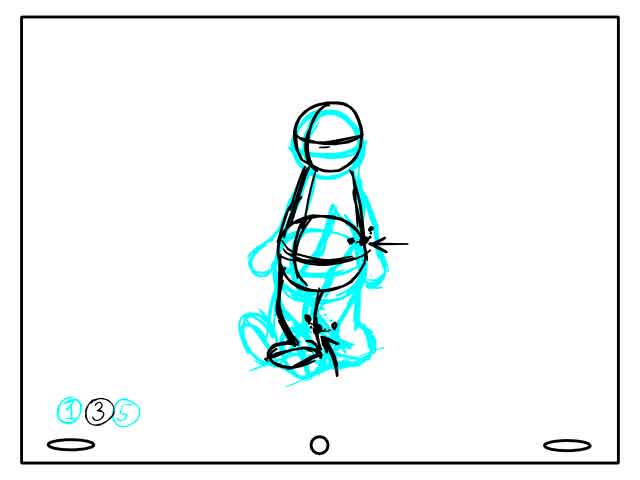
...making it easier to flesh out your animation.

wlo28

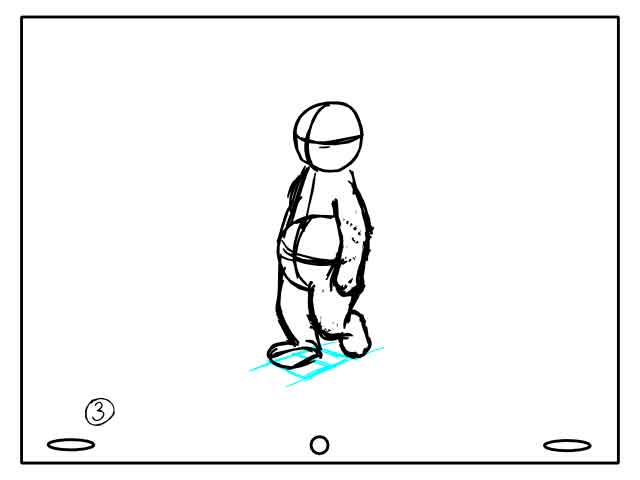
With Frame 3 drawn, you can get Frame 7 by tracing the body (arms included this time) and switching the position for the legs.
wlo31


Here are the Main Key Frames animated. Notice how just 4 drawings are enough information to convey a walk. In future exercises, you will learn how to create several types of character walks by simply changing these 4 drawings.

Content on this page requires a newer version of Adobe Flash Player.

Get Adobe Flash player


INBETWEENS:
Now, with our Extreme and Mid Keys done, we can start to tween those.


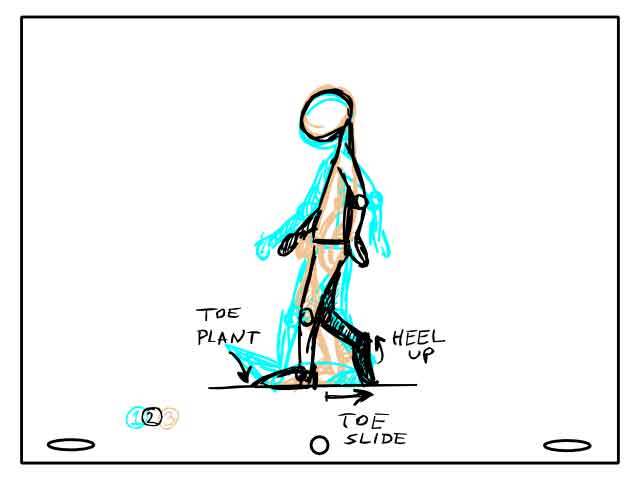
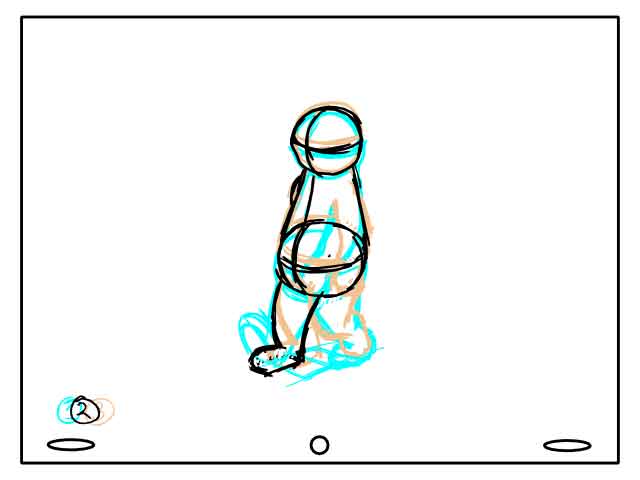
5). Frame 2- Let's look at the Side Walk again for reference.
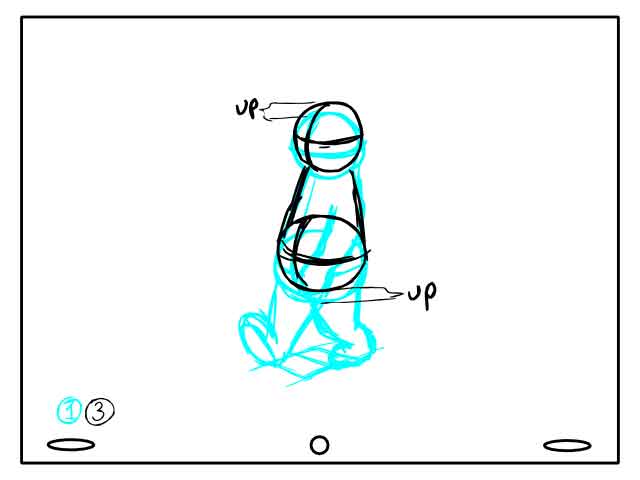
First, the arms swing and the body rises into its next position between Frames 1 and 3.
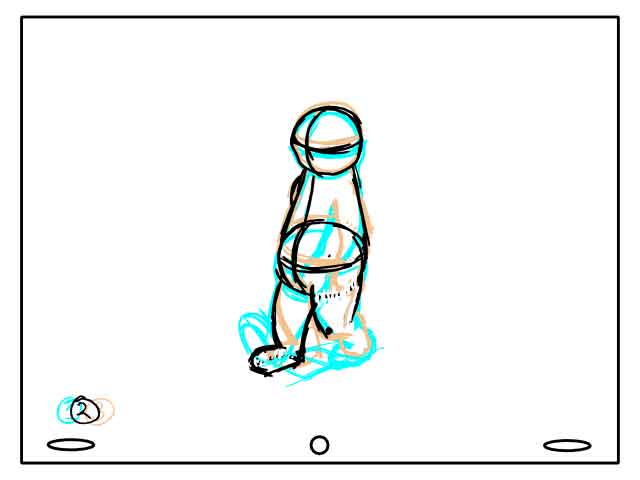
Next, notice how the foot out in front is planted completely flat. The heel is the only consistent reference point between 1 and 3 (since the toe points upward in Frame 1) so that must be used to find the center placement for that foot.
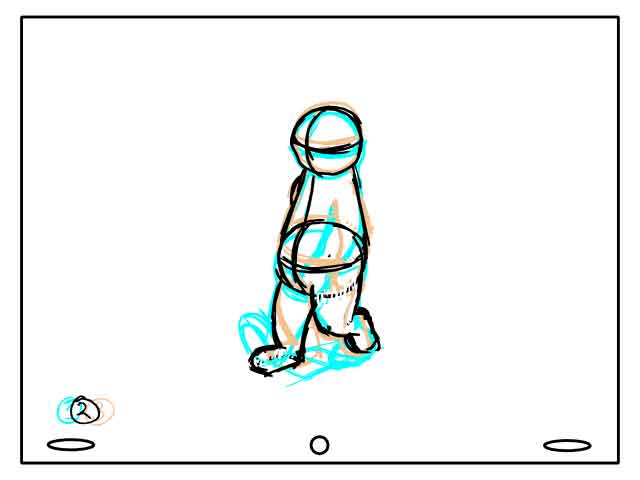
Finally, notice how the shaded back foot does two things- First, the toe continues to slide back as opposed to moving forward towards its next position. Second, the heel moves forward but also up.
wlo32
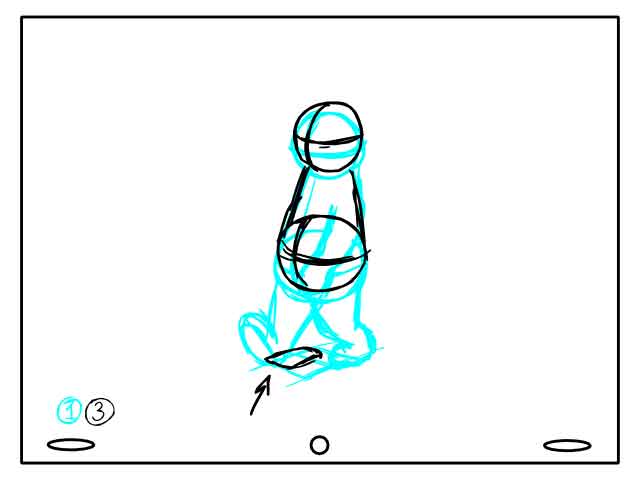
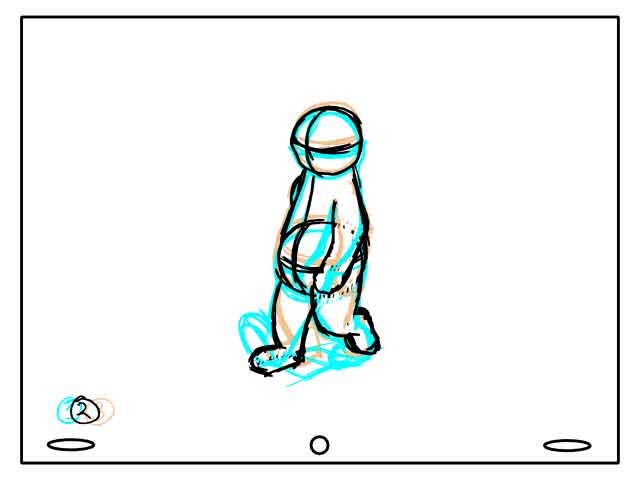
Now apply these rules to the 3/4 Walk. Notice how the heel is used to find the foot position...

wlo33wlo34
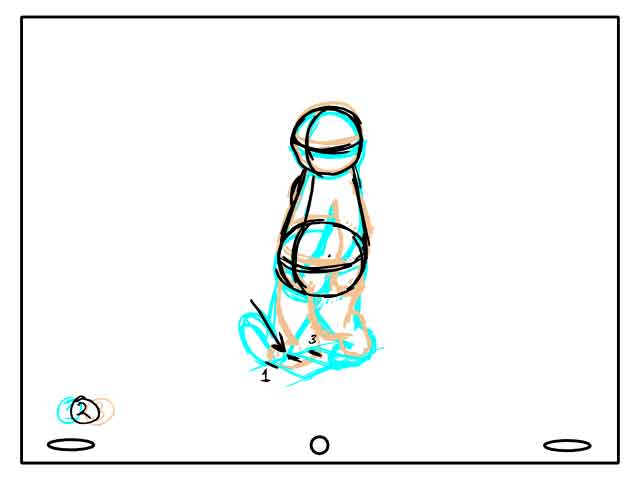
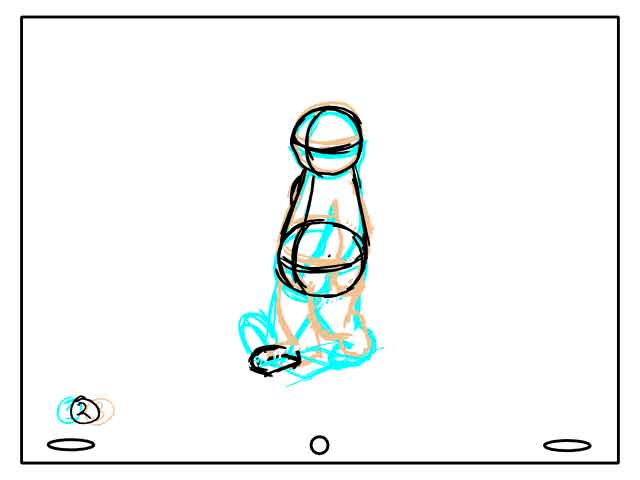
...and the leg lines are simply drawn between the other leg lines.
wlo35wlo36
Toe goes back, heel comes up and the arms fall easily between their twins.

wlo37wlo38

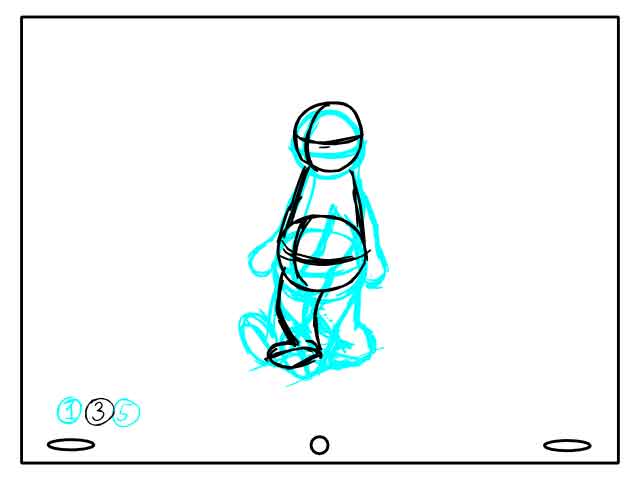
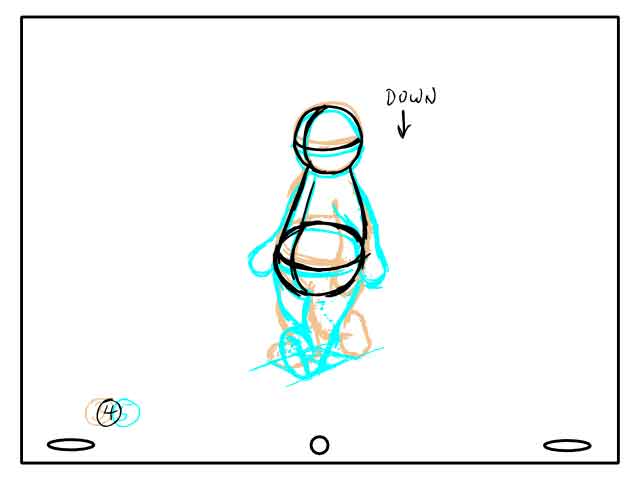
6). Frame 4- Back to the Side Walk once more.
The arms continue swinging but the body now lowers into its next position between Frames 3 and 5.
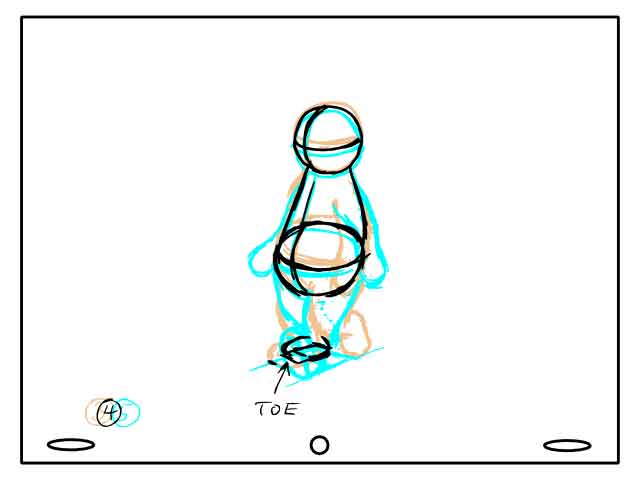
The foot that is planted continues sliding back, except it is the toe we must use as a reference point (since the heel is raised up in Frame 5).
The foot that is lifted continues to come forward as it slides into its position but notice how the knee over-extends itself slightly. This is so it will snap back into position on Frame 5 adding appeal to the movement.
wlo46
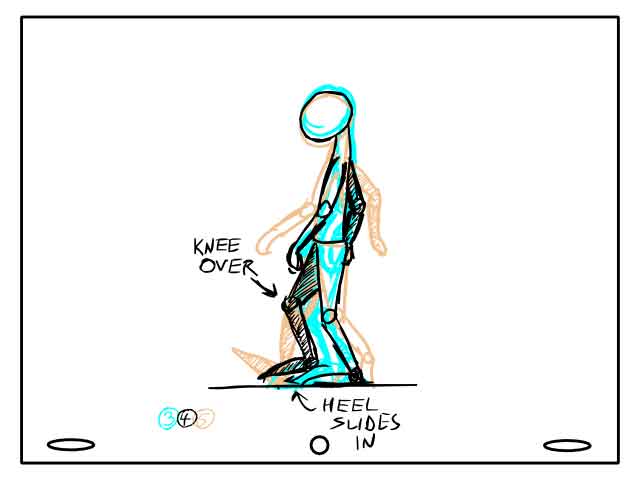
Now let's apply this to the 3/4 Walk. Notice how the toe is now used to find the foot's planted position.
wlo39wlo40
Center the lines to connect the leg to the body. Knee over-extends while the foot swings in to plant the heel...
wlo41wlo42
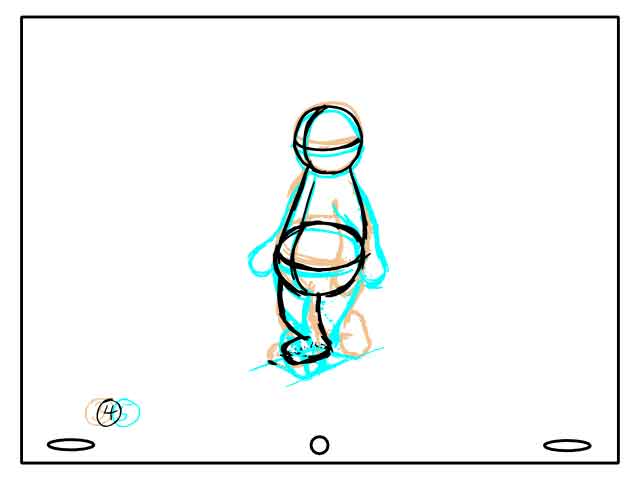
...and arms are centered to complete the tween.
wlo43

Here are Frames 1-5 that make up the first step in the walk.
Notice certain things as he steps:
The whole body raises then lowers.
The arms swing in a smooth transition from one position to the other.
The planted foot moves solidly along the plane set by the Area Box.
The other foot lifts, swings forward and then plants itself.

Content on this page requires a newer version of Adobe Flash Player.

Get Adobe Flash player


7). Now, use drawings 5 and 7 to get 6 then drawings 7 and 1 to get 8. You are simply repeating steps 5 and 6 above for the other half of the walk.

Here is what the finished product should look like-

Content on this page requires a newer version of Adobe Flash Player.

Get Adobe Flash player

©2010 Randy Gossman